Need to know
Fixing your WiFi channel may seem like a 'quick fix' for some things, but it can do more harm than good. Wireless traffic changes by the second, and a channel that is 'good' one minute may be 'bad' the next.
Fixing the WiFi channel is like turning off 'auto-pilot' and could result in your router sitting in traffic, rather than taking a faster detour.
Follow these simple steps to set a fixed WiFi channel on your hub:
- Using a device connected to your hub, open a web browser and enter http://192.168.1.254 to access the Hub Manager.
- Select Switch to HTTPS on the screen shown.
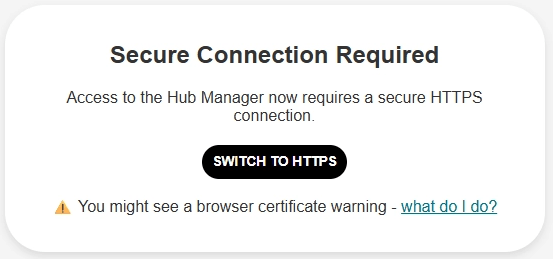
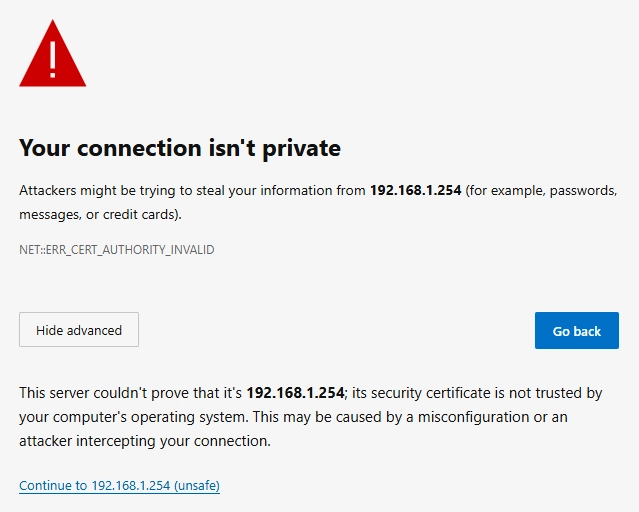
- If presented with a browser security warning, then follow our instructions about a Security warning when accessing the Hub Manager to proceed
- Go to Advanced settings.

- You will be prompted for your hub admin password, which is on the removable Settings Card on the back of your hub.
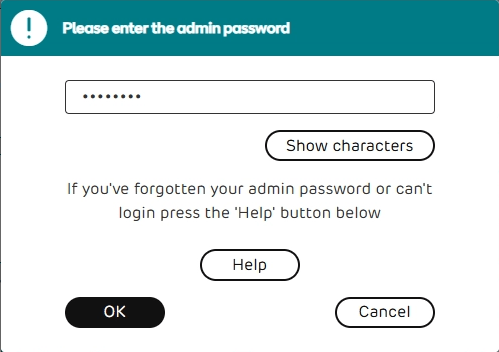
- Enter the password from there and select OK.
- Go to Wireless.
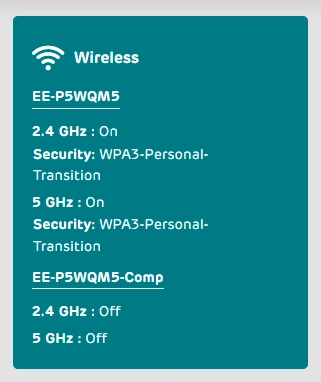
- Scroll down to the 2.4GHz section and open the Channels dropdown.
- Select channel 1, 6 or 11 from the list of available channels.
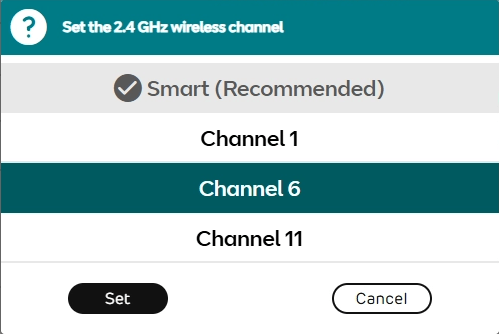
- Select Set.
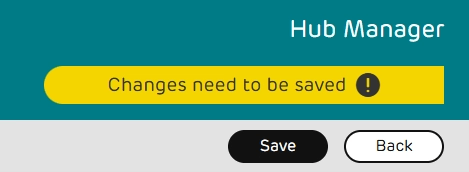
- Scroll back to the top of the page and select Save.
- Select Yes to accept the warning and save your changes.
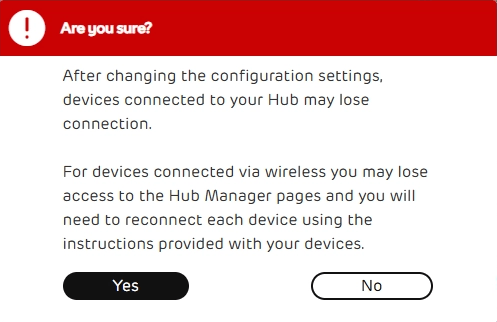
After saving the changes, devices on your network may suffer a brief interruption in connectivity. If you are struggling to reconnect any devices after making this change, then try powering the affected device off and back on.